
Pressure Canning Ground Venison Meat (Easy How To Recipe)
If you’re running out of freezer space, canning ground venison is a great way to have a shelf-stable product at your finger tips for quick, easy meals.

In case you aren’t familiar, venison is the term for deer meat. Like beef is for cow meat, or pork is for pig meat.
Being from rural Ohio, the only thing better than Christmas for many folks out here, is deer season.
The state limit for harvesting venison is 6 deer, per hunter. On average, a hunter can take home 52.19 pounds of meat from each deer harvested.
Because we choose to process our deer at home, it costs us almost no money for a high quality, lean, red meat to feed our family through the year.
Part of our yearly processing goals is to stock the pantry shelves with various canned meat, including ground venison.
What do I Need for Canning Ground Venison?
Equipment
- Dial Gauge Pressure canner (I use this one)
- Pint or quart jars for your meat (I like to use pint jars because they hold about 1 pound of meat)
- Canning supplies like a jar lifter and canning funnel
- A cast iron pan or dutch oven to cook the ground meat before canning.
- A towel or dish mat for putting the hot jars onto to protect your counter after canning.
- White distilled vinegar for wiping your jars rims/cleaning your jars after canning
Ingredients
- Raw, ground venison
- Water or broth
- Fine salt or canning salt (just not iodized table salt)

How to Can Ground Venison
1. Prepare the Jars for Canning
Choose the size of jars and number of jars you’ll need for this project. Consider that about one pound of ground venison will fit in one pint jar, and two pounds of ground venison will fit in a quart jar.
Wide mouth or regular mouth doesn’t matter as long as they fit in your canner.
After calculating the size and number of jars you plan to use for pressure canning ground venison, get them warming up.
We are following a hot pack method with this recipe, so you want the jars, canner, and meat to be close to the same temperature to prevent jar breaks.
You warm them up by adding them to your canner with water while it heats up, or to your dishwasher if the drying stage heats them up.
After washing, my dishwasher heats the jars up considerably during the drying process.
When I start preparing my venison and pressure canner, I will run my pint jars, gaskets, and screw bands, through the dishwasher so they are hot and ready for me.
2. Prepare the Venison

To ensure the safe preservation of venison, you’ll need to prepare your raw meat by searing it most of the way through in a hot, heavy bottomed pot.
You don’t want it to be at the rare stage, but you’ll want to “get the pink off” as my more old-school-canner family members would say.
Add 1 to 1 1/2 cups of water or broth to the pot of meat and bring up to a simmer to make sure the entire contents is the same temperature.
Some recipes call for adding tomato juice as the liquid. I prefer water as it will form its own broth. Adding tomato juice limits the applications for using your canned meat later.
You can add black pepper or other seasonings at this stage, but I save adding the salt until it’s jarred.
Taco seasoning, chili seasoning, etc are safe add ins that can add variety to your canning, but I usually just can all of my meat “plain” with just salt and pepper, and season them further later.
3. Prepare the Pressure Canner
Now that the jars and meat are heating, you need to get your pressure canner heating up.
Pressure canning requires that you put two inches of water in the bottom of your canner.
Heat the pressure canner to the same heat temperature as the skillet of ground meat (medium).
4. Fill the Canning Jars
Once the meat is cooked and the canning jars and canner are all hot, it’s time to fill the jars.
Fill your hot jars with the hot meat and the hot broth or water to 1-inch headspace using your canning funnel.
(The inch of headspace is measured from the top of the jars to the food contents.)

Maintaining proper headspace will prevent your hard-earned food from siphoning out of the jar.
Add 1/2 tsp salt per pint jar or 1 tsp salt per quart jar.

Wipe the jar rims with a clean dish rag using white vinegar. This will ensure that you get a proper seal free of grease or food particles.
While wiping the rims of the jar, be sure to check for any blemishes in the glass of your jars to prevent bad seals or breakage.
Place new lids (gaskets) on the clean jar rims and tighten a screw band to finger-tip tightness.
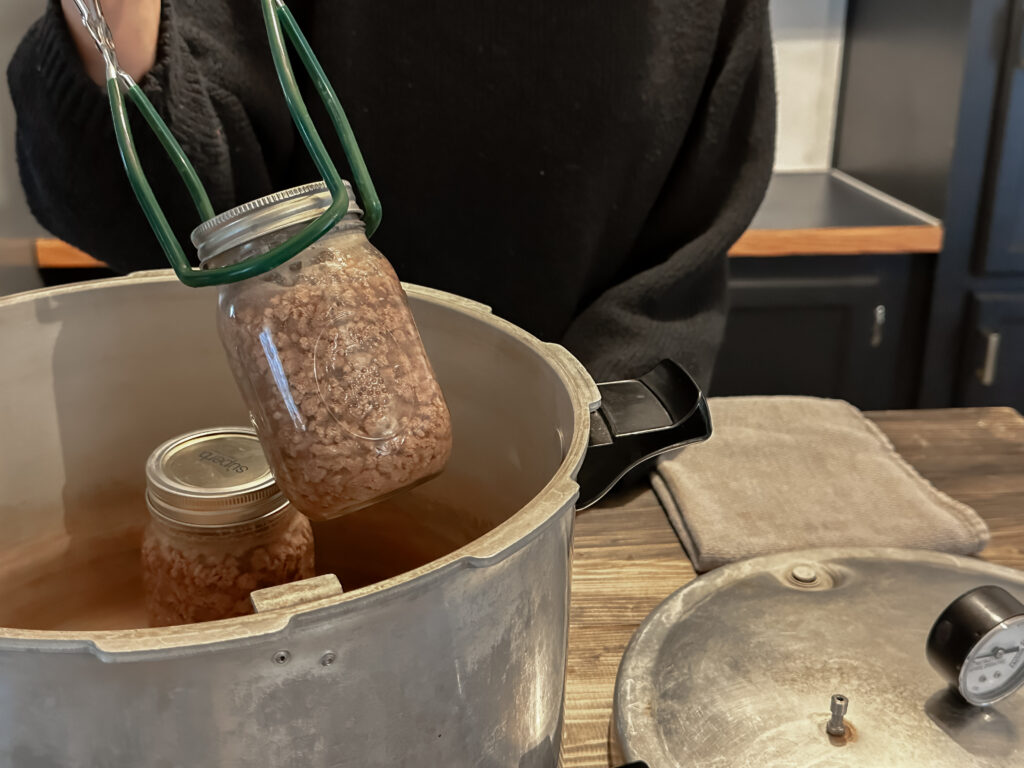
Put your jars into the hot canner and add the lid.
Canning Ground Venison
Following your manufacturer’s instructions for your canner, process the ground venison at 10 pounds of pressure for 1 hour and 15 minutes for pints, and 1 hour and 30 minutes for quarts.
Most dial gauge canners require a steady stream of steam to be coming from the vent for 10 minutes before placing the weight. Bring the pressure to 10 psi (or higher depending on your altitude) and stabilize the heat to maintain pressure.
After the processing time is completed, turn off the heat, but leave the pressure canner on the burner.
Allow the canner to remain on the burner, with the lid on for 5 minutes.
Remove the lid, and allow the jars to remain for an additional 10 minutes.
Once the 10 minutes have passed, place the jars on your dish mat or dish cloth, and cool in place for 12-24 hours.
After the jars are cool, the jars can be stored.
Storing Canned Venison
Once your venison has been canned and cooled, remove the bands and wipe the jars thoroughly. You shouldn’t put dirty jars in food storage.
Label the lids clearly so that you know what you are grabbing for your next meal.
According to the USDA (United States Department of Agriculture), High-acid foods will keep their best quality for up to 18 months. Low-acid foods can maintain quality for 2 to 5 years.
If jars and lids remain dent free with no swelling or rust, and are stored in a cool, dark place, they are safe indefinitely.
To ensure best storage, choose a cool, dark place for storing your jars.
If you happened to have a seal failure, don’t panic! As long as there isn’t broken glass involved, you can store it in the fridge and use it within a week like any other freshly cooked meat leftovers.
Benefits of Pressure Canning Venison
Canning foods is an important part of our yearly processing plan for our home grown and locally sourced ingredients.
When the freezer fills up after the fall harvests, it’s time to get the canners going!
Not only does pressure canning meat create a delicious, easy to use product, but it also creates food security.
In the event of a power outage, we have quick meals we can heat up on the wood stove that we don’t have to worry about spoiling because it’s shelf-stable after canning.
If you want more venison canning recipes, check out my canning stew meat recipe and my easy venison or beef stew recipe
Also, I find that the pressure canning process when it comes to meat is very simple and straight-forward.
Some of us have never made homemade jam or pickles, but almost all of us have browned up ground meat! And that’s the hardest part of canning it!
What Can I Use Canned Ground Venison For?
Canned venison of any kind is extremely similar to canned beef ground. The main difference is that venison is a learner meat than beef. It just doesn’t have much fat on its own.
Other than being leaner than beef, venison can be used exactly like ground meat in most of your favorite recipes.
Some people will say that because venison is a wild game, that it can have a gamey flavor. We have not had that problem with our deer meat. At all. However, we do our own processing, so we have the ultimate control over freshness and how thoroughly the fat is trimmed, resulting in a cleaner tasting meat.
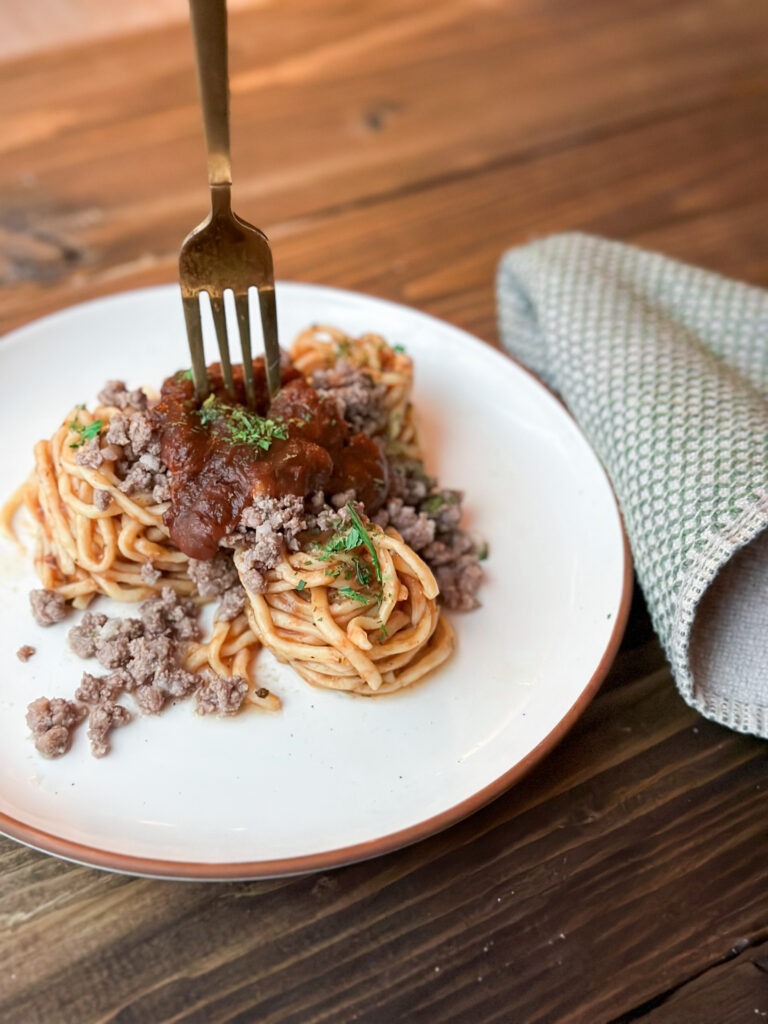
Think of all the ways you’d use cooked ground beef: making your own version of hamburger helper, bolognese, stroganoff, tacos, enchiladas, big mac salad… The list goes on.
The point is, canning ground venison provides a ready-to-eat, convenient, and extremely versatile protein to your pantry shelf.
The only ways you wouldn’t want to use your canned meat would be for things like meatballs or hamburgers. Because home-canned ground deer meat is already cooked, trying to bind it into a patty or meatball won’t be very successful.
Can I Water Bath Can Venison?
No.
Venison, or any other kind of meat, can not be water bath canned.
Meat, broths, and many vegetables are considered low acid foods. This means they can not be safely preserved unless they are pressure canned.
If you want more information about canning safety, the National Center for Home Food Preservation can be checked out here and is a great source for getting started.
If you want to read more about the difference between Water Bath Canning Vs Pressure Canning, low-acid foods vs. high-acid foods, and equipment, you can read about that here on my blog.

Pressure Canning Ground Venison Meat (Easy How to Recipe)
Ingredients
- Ground Venison 1 pound per pint or 2 pounds per quart
- 1 cup water or broth per quart of ground meat
- Black pepper to taste optional
- 1/2 tsp fine salt or canning salt per pint of meat 1 tsp per quart (optional)
Instructions
Prepare the Jars
- Choose the size of jars and number of jars you'll need for this project. (One pound of ground venison per pint, two pounds per quart)
- Get the jars and lids warmed up by heating them in your canner with water, to a sink of very hot water, or to your dishwasher if the drying stage heats them up.
Prepare the Venison
- Sear ground meat over medium high heat until just not pink.
- Add 1 to 1 ½ cups of water or broth to the pot of meat and bring up to a simmer to make sure the entire contents is the same temperature.
- Add black pepper or other seasonings to tase. Save salt for later.
Prepare the Pressure Canner
- Fill canner with 2 inches of water and heat over same temperature as meat.
Fill the Canning Jars
- Fill your hot jars with the hot meat and the hot broth or water to 1-inch headspace using your canning funnel.
- Add 1/2 tsp salt per pint jar or 1 tsp salt per quart jar.
- Using a chopstick or butter knife, clear the jar of air bubbles by inserting it down the four sides of the jar.
- If needed, add more hot water to maintain your one-inch headspace.
- Wipe the jar rims with a clean dish rag using white vinegar.
- Be sure to check for any blemishes in the glass of your jars to prevent bad seals or breakage.
- Place new lids (gaskets) on the clean jar rims and tighten a screw band to finger-tip tightness.
- Put your jars into the hot canner and add the lid.
Canning Ground Venison
- Following your manufacturer's instructions for your canner, process the ground venison at 10 pounds of pressure for 1 hour and 15 minutes for pints, and 1 hour and 30 minutes for quarts.
- After the processing time is completed, turn off the heat, but leave the pressure canner on the burner.
- Allow the canner to remain on the burner, with the lid on for 5 minutes.
- Remove the lid, and allow the jars to remain for an additional 10 minutes.
- Once the 10 minutes have passed, place the jars on your dish mat or dish cloth, and cool in place for 12-24 hours.
- After the jars are cool, the jars can be wiped and stored without the bands in a cool, dark location.
Notes
- Seasonings like taco or chili seasonings or dried herbs can be added safely if desired.
- Pounds of pressure for processing are dependent on your altitude.
- For additional canning information, consult your operating manual for your canner.


